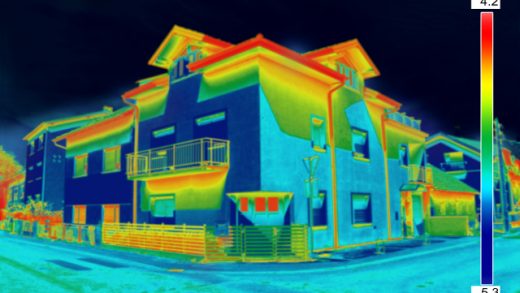
Thermal imaging inspections are very helpful for people who own homes and want to improve how efficiently their homes use energy and find problems that are not easy to see. As technology gets better thermal imaging has become a choice for finding issues that are not visible like air leaks, water entering the home and not enough insulation. However to get the most out of an imaging visit homeowners need to get ready. Problems like air leaks and wet areas can make a home less comfortable and more costly to heat or cool. Finding these problems before the inspection helps the person who does the thermal imaging give a more focused assessment. Here is how you can make a full list to get ready for your imaging inspection.
Looking for Air Leaks in Your Home
Air leaks are a problem in homes and can make it harder to stay comfortable. They also make heating and cooling systems work harder and increase energy bills. To get started walk around your house on a day when it's windy or right after the heating system has been running. Pay attention to parts of the house where air leaks are most likely to happen, like near windows, doors and vents. If you feel a cold spot or notice air moving in a place write down where that happens.
Simple fixes like adding weather stripping or sealing gaps with caulk can help with some problems. Finding the places where air leaks are happening can help the person doing the thermal imaging do a better job. Also check if the air leaks are coming from one direction. This can show if there are problems with the insulation or if the air sealing is not good. For example if you feel a leak coming from a window it could mean that the window is not sealed properly or has gotten worse over time.
Finding Wet Areas in Your Home
Wet areas in a house can cause problems over time like damage to the structure and health issues from mold. So finding wet areas before the thermal imaging check is important. Look for signs of damp spots or color changes on walls, ceilings or floors. Areas near pipes, windows and the roof are more likely to have leaks and should be checked carefully.
If you smell a musty smell or feel the air is unusually wet that could mean there is a hidden moisture problem that's not easy to see. Writing down what you see is important because thermal imaging can show surface temperature patterns that warrant further moisture checks; it does not see through walls or confirm moisture by itself. Still knowing where to look makes the check more complete and helps with fixing the problem.
Noting What Each Room Is Like
Each room in your home has its features that can affect how well it keeps heat and how much moisture it has. Basements and attics for example often have temperature changes because of where they are and how they are built. As you get ready for the check take a look at each room. Are there parts that always feel warmer or cooler than others? Are some areas more humid than others?
These ideas can be very useful for the person doing the imaging. They will use the imaging to compare temperatures in rooms, which helps find problems with insulation, air leaks or places where moisture builds up. For instance if your basement feels much colder than the other parts of the house that could mean it has insufficient insulation or not enough air flow that needs to be fixed.
Checking for Old Windows and Outdated Insulation
Older homes often have single-pane windows and old insulation both of which can make the home less efficient and lead to moisture problems. If your home is older it's worth checking what kind of windows you have. Single-pane windows are not good at keeping heat in and allow more heat to escape compared to double- or triple-pane windows.
Also look at the condition of your insulation from accessible areas. If it is squashed, wet or old that can make energy problems worse. Be sure to write down any details about your windows and insulation. The information you collect will help the person doing the imaging see how these things affect how the home keeps heat and moisture.
Knowing About Your Heating and Cooling Systems
Your heating and cooling system is very important for how comfortable your home is and how much energy it uses. Before the imaging visit think about the type of heating and cooling systems you have and how they are doing. Look for signs like leaks in the ducts or parts that are worn out. These problems can make the system work worse.
Understanding how your heating and cooling system works helps the person doing the imaging when they look at the results. For example if you have a system that uses forced air thermal imaging can show if there are leaks in the ducts that cause temperature problems in parts of the house. This information is important for finding solutions that make the home more efficient.
Getting Ready for the Thermal Imaging Day
As the day of your imaging inspection gets closer make sure that all the areas to be checked are easy to reach. Move any furniture or things that are in the way. Also make sure the rooms are at their normal operating temperatures. This helps the person doing the check get the readings. If possible plan the inspection when your heating and cooling system is on. This can help show temperature changes.
Having your list ready makes the inspection go smoothly and helps the person doing the check focus on the areas you're worried about. Your effort can lead to a more thorough assessment and help make your home more efficient.
Summarizing What You Found
Finally put all your notes into a short list with details about air leaks, wet areas and the conditions of the rooms you noticed. This summary is important for the person doing the imaging and can make the results more useful.
By doing these steps you make sure your thermal imaging visit is as good as it can be. The more you know about the problems, in your home the better the person doing the imaging can look and suggest solutions that make your home more efficient, comfortable and better overall.